-
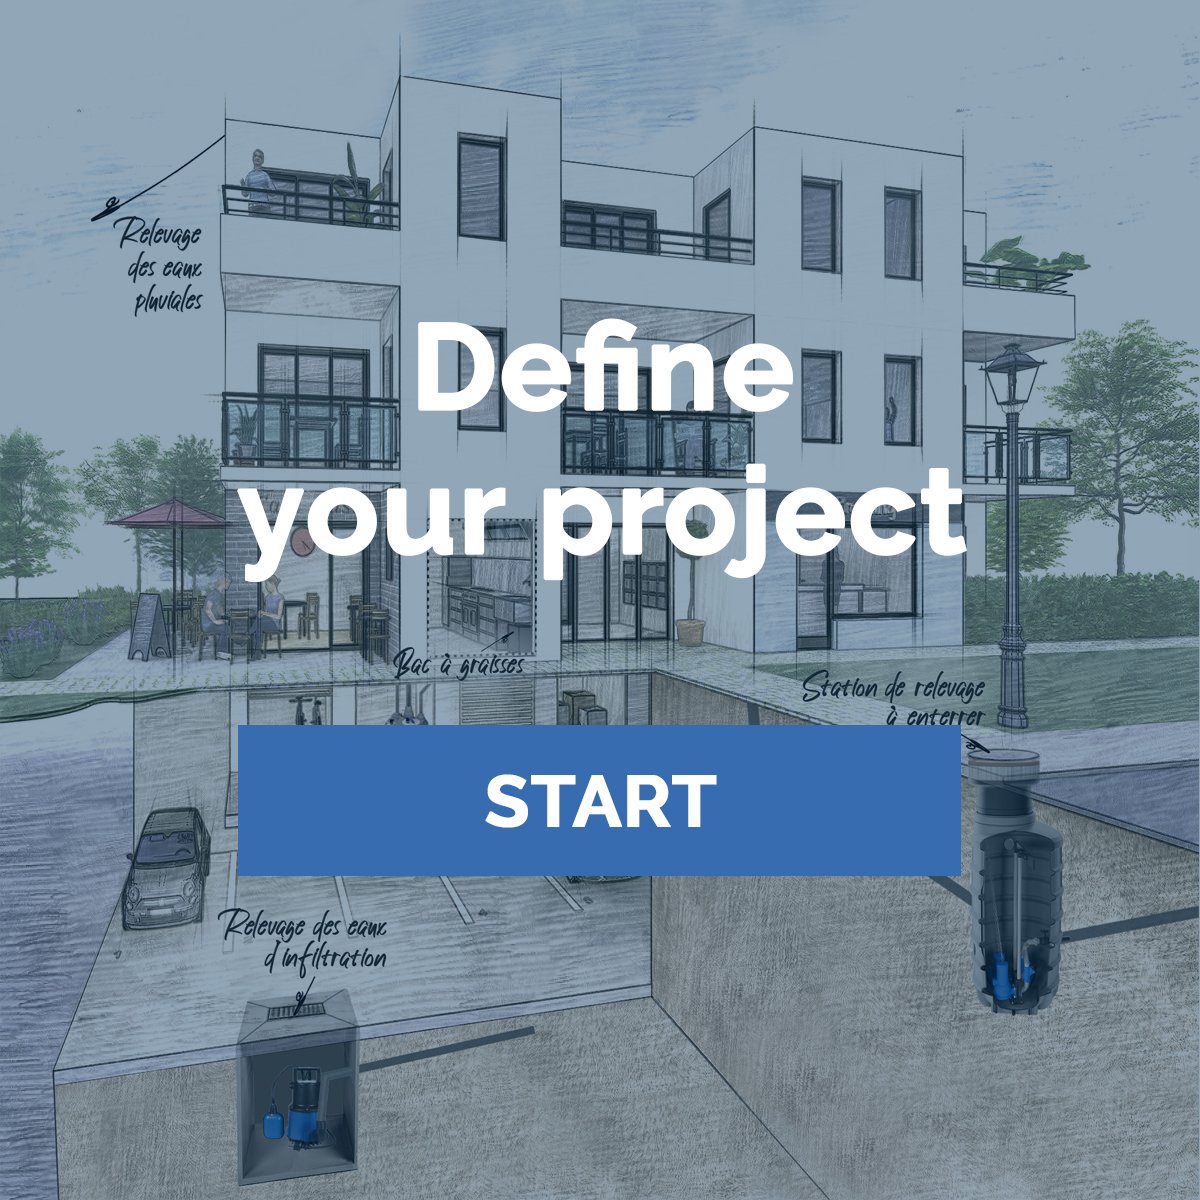
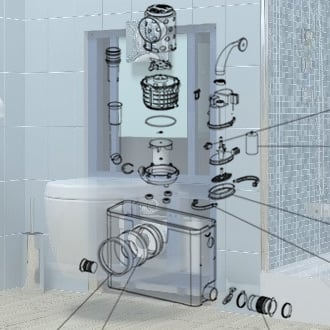
Whether its to install a new bathroom, additional toilets, a laundry room or to connect a condensate drain, SFA has the solution that meets your needs. With little work you can simply drain and pump waste water away.
-
For a boiler, an air conditioner, a shower, a toilet, a kitchen, a laundry room, a refrigerated display case, a house or even a complete building, SFA has been the specialist in lifting all water since 1958 whether you are an individual or a professional, we have the solution that meets your needs.

-
Product news, installation stories, business information, find out all the latest information here.

-
If you have any question, want to install our product, or need to find a service agent we are here to help!
-
From the invention of the first macerator more than 65 years ago right up the innovation happening today, find out about The SFA group and Saniflo Australia here.
-

How to achieve an outdoor bathroom
01/18/2023

Everyone loves swimming pools. Whether it’s a fun afternoon by the pool or a late midnight swim, let’s admit it, in summer there’s nothing better than taking a dip in fresh, clear water.
Well, there is actually one thing that is better: having a proper shower after your swim! Getting rid of all the chlorine or salt, feeling nice and fresh, and not dirtying the house by coming in with wet feet… What’s not to like?
In order to have this convenience, you’ll need to build your own outdoor bathroom. Not just an old shower plugged on the hosepipe, but a proper bathroom, with appliances that will make you prefer this one to your traditional indoor space!
Already dreaming of your outdoor bathroom? Follow the steps!
Step 1: Choose the spot
What’s great about an outdoor bathroom is the connection with nature while having a wash. But be careful with the spot you choose. In order to be able to enjoy this area fully, don’t choose a place from where your neighbors might see you! Instead, pick a quiet and hidden spot, or create a wall that will cover you from view.
Another element to take into consideration is the proximity to the trees: do you want to build your new area under a tree to enjoy shade while showering, even though this comes with the risk of finding more bugs and leaves in the shower, or would you prefer your shower to be far from the trees so that the area will remain a bit cleaner?
One thing you won’t have to worry about is the location of the area within the garden in terms of plumbing. Even if your new space is as far from the house as 100m, there is a Saniflo product available to make it possible. Saniflo
Step 2: Find the appliances
Once you chose the spot, you will need to pick the appliances that you want. I suggest that you create a fully furnished bathroom area, including a washbasin, a shower, and definitely some storage. You can even build a little toilet shed next to this new area for added pool time convenience!
First things first, choose the style. Timber and stone are always good bets, but you can also be bold and choose mosaic tiles!
Then, make your dream area achievable! You’ll need two Saniflo products to supply water there: the Sanifloor will take care of the grey water from the shower while the Saniaccess will support the toilet as well as the washing basin. If your new bathroom is far from the house, you can use the Sanicubic 1 as this pumps further distances. Contact Saniflo for more information.
Step 3: Decorate… and enjoy!
Once the main appliances are installed, you can add elements that’ll give life to your new area. Storage boxes for the towels, lighting (electrical and candles), some mirrors. Here, storage is a key point: watertight and airtight boxes will save your life so that you’ll never need to worry about dampness. If you love wicker looking baskets, be sure to store them up high or further away from the water to prevent damp.
Now that you have this new area, nothing will stop you from spending full days next to the pool with your friends, family, and kids! Unless you get hungry… in this case, consider installing an alfresco kitchen!